
Syncthing, Plex, and Purchased Music
For a couple months now I have been a little obsessed with backing up my media library (mostly music) in a way that is reflected on my primary laptop as well as on the server it is backed up to. Prior to this, I had Backblaze for all my backup needs, as well as Google Drive since I have quite a bit of space there. While these are nice, I wanted to own my backup too for my own peace of mind. A friend of mine recommended I look into Syncthing. Syncthing is essentially a light weight Dropbox/Google Drive/One Drive like system. You setup two computers (in this case a server and a client) and have them exchange unique ids. This allows them to identify themselves and sync data back and forth. It seemed like a simple solution, and FreeNAS (the linux based OS that runs my NAS server) had built in support for Syncthing.
Getting Started on the Server
I won’t be going into setting up your NAS, so if you haven’t done that you’ll need to find a different guide.
We’ll start by downloading the Syncthing plugin and installing it from our Freenas Web GUI under the “Plugins” tab.
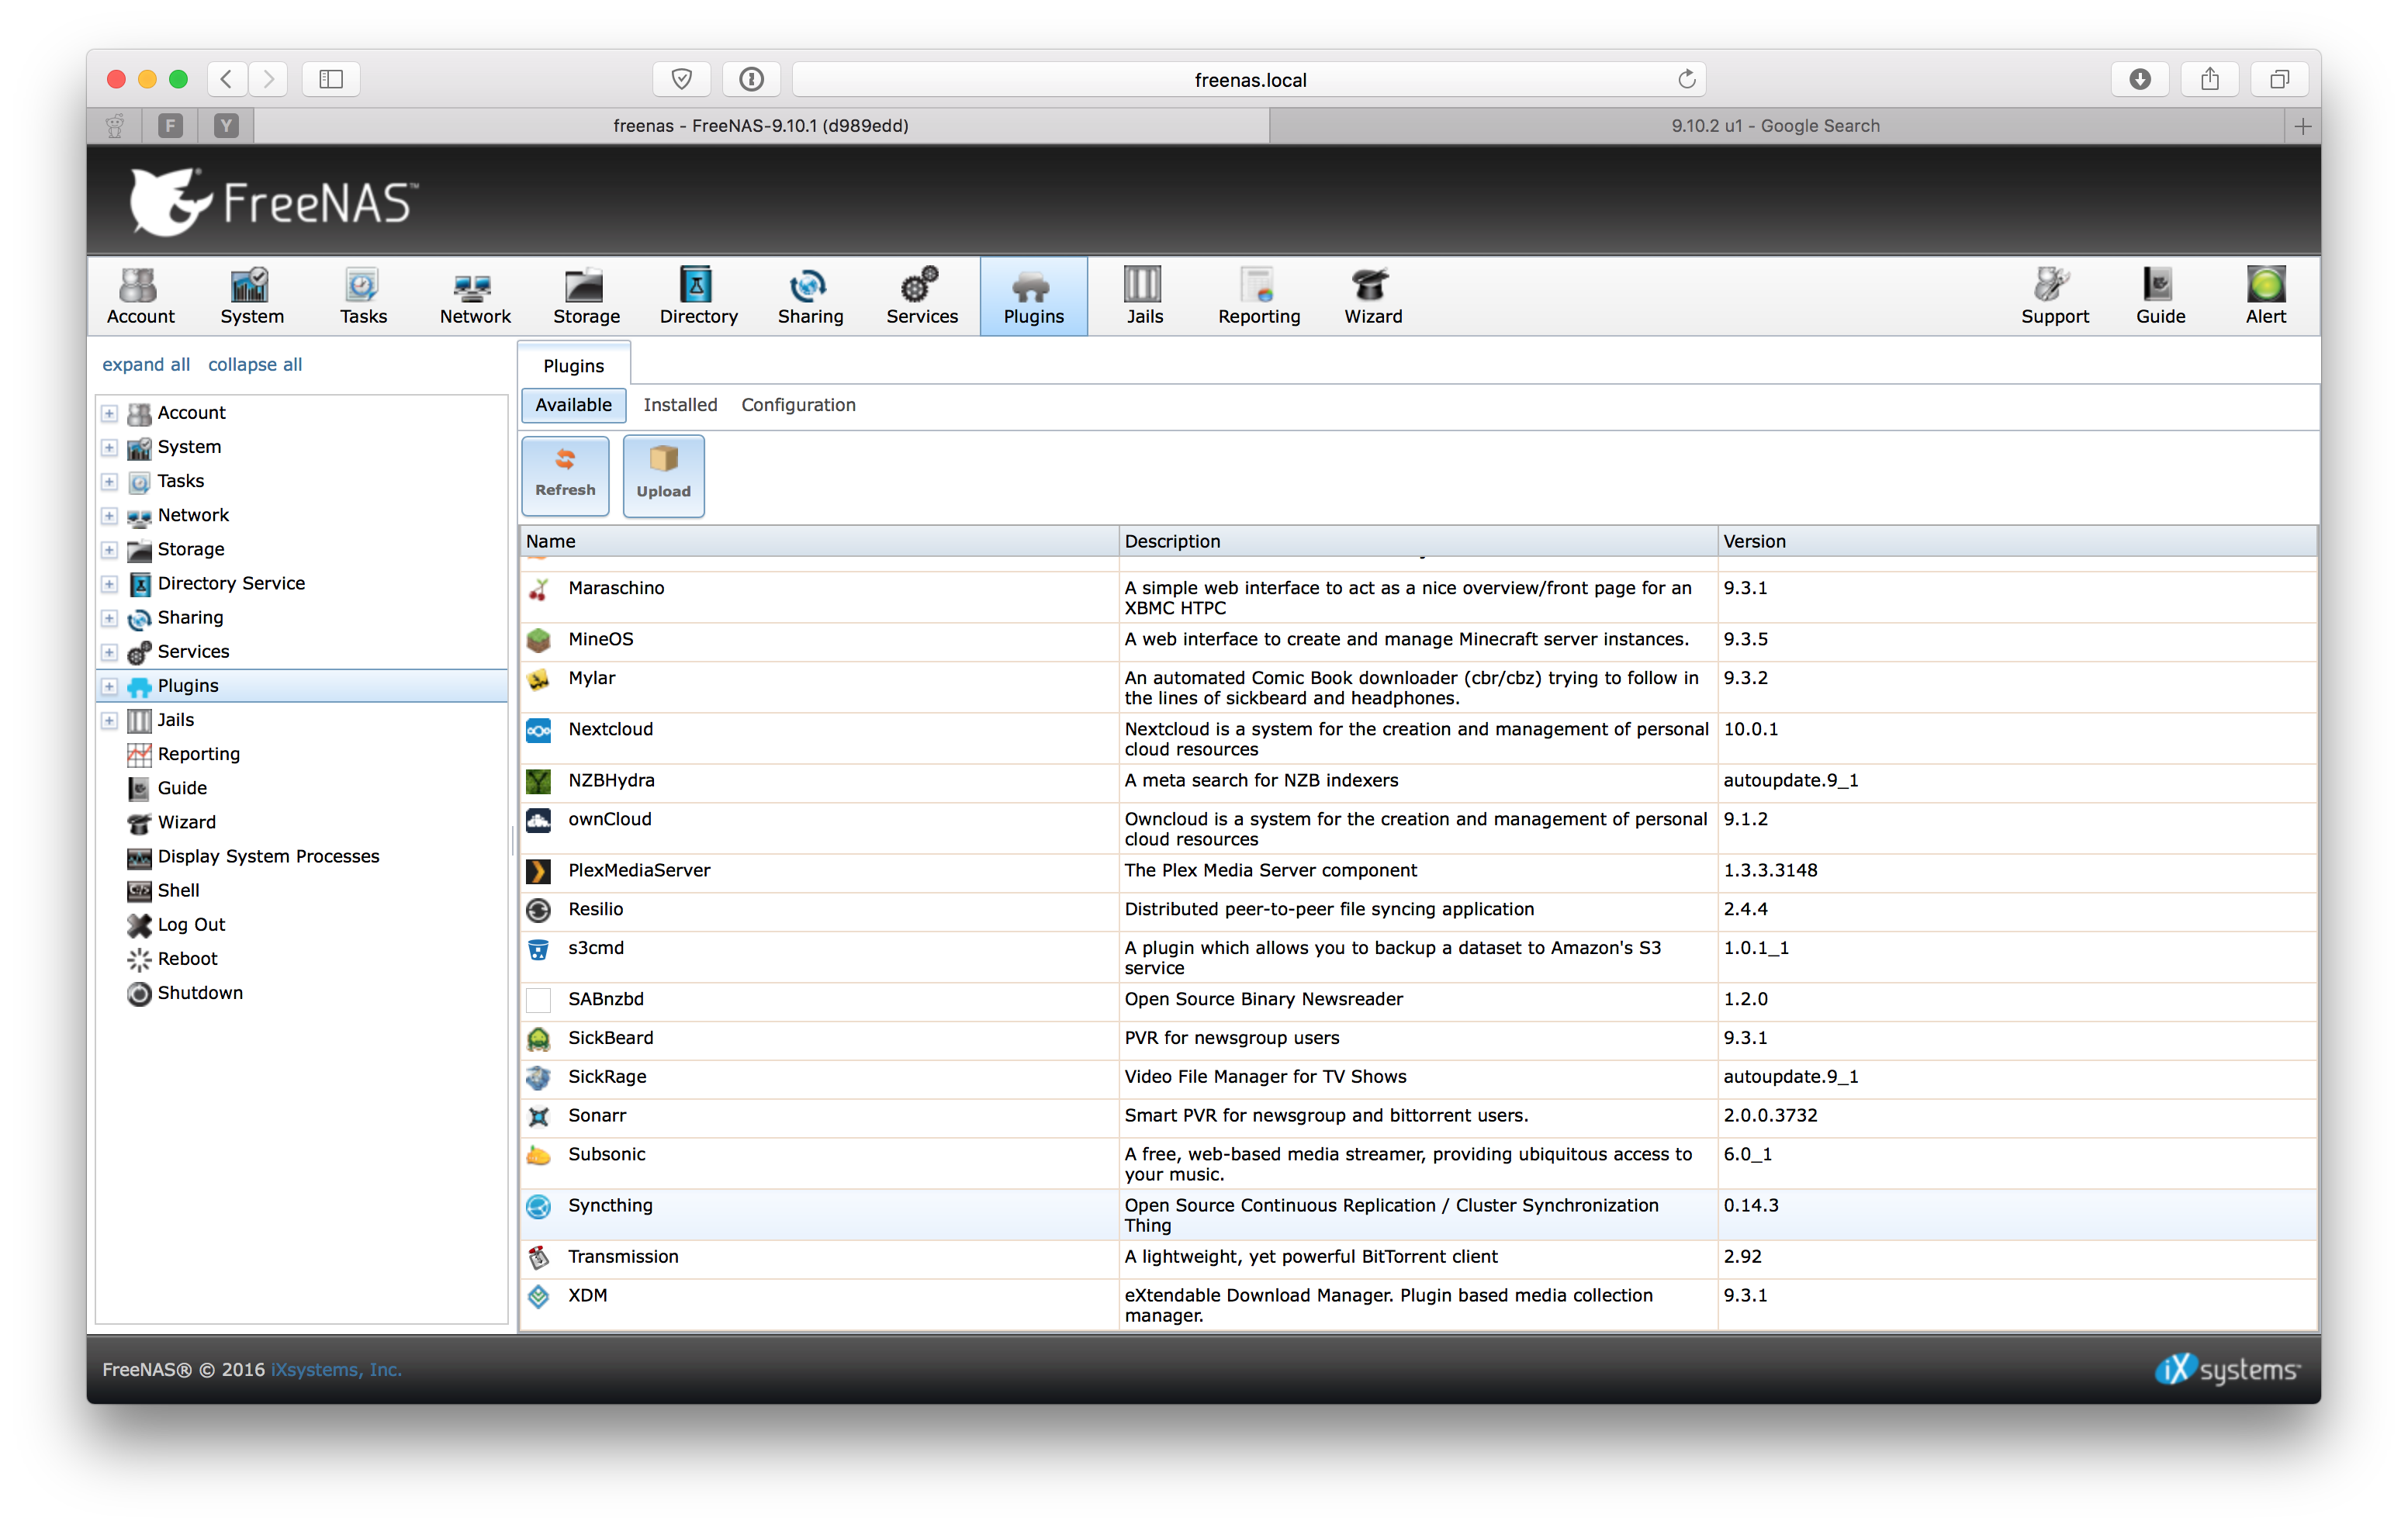
This will take a minute to download and install, once we are done we can move to setting up permissions and groups. Depending on your use case this may differ.
When it comes to configuring it, I highly recommend following this guide since it provides the most accurate step by step setup. I won’t reproduce it here since the original author did such a great job.
Syncing
Once you have followed the guide above, you can access the Syncthing panel. Click on the “Plugins” dropdown in your Freenas panel on the left hand side, and then select Syncthing. It will offer to direct you to another (local to the freenas) site. In there you will be prompted to secure your server with a login.
After securing your server, you will need to add the device you plan on syncing. In this case, I used my MacBook Pro. Open up a terminal and install the syncthing client using Homebrew.
brew install syncthing
Once you have done that, you can get it started and set it to start on startup using brew services start syncthing. This will bring your local server up so we can get the UUID to exchange with our server. To access this we will need to go to the local server. We can do this by finding the port it runs on via the config file. You can find the config file at ~/Library/Application\ Support/Syncthing. This file has a number of settings as well as your UUID. The UUID can be found at the top of this file. However, we are going to navigate to the local web gui so we can do this through that interface. In the config file you will need to find the line that has 127.0.0.1:xxxx. The xxxx will be a port number. Open up your browser and copy paste localhost:xxxx where xxxx is the port number you found.
This interface should look identical to the server version we saw earlier. Now, to exchange keys, go to the “Add Remote Device” on each and input the UUID of the other device. The UUID can be found under the “Show ID” option in the top right drop down.
Once you have done that, you can delete the “Default Folder” and setup a new folder for your media. I called mine “Music”.
Plex and Syncthing
Alright so this is where it got a little complicated. If you successfully followed the guide I linked above, you probably are all set on the syncing front. You can verify that your data is being synced the way you want to the right place. However, since we are working with Freenas we are dealing with jails. Due to this approach, we have to tell Plex what it can see (by default it can’t).
There is another issue I found with this, and that is that even when providing the proper permissions to the plex user (generic user, like the syncthing user described in the guide above), Plex still couldn’t see the mounted volume. In the end, I had to provide Read and Execute permissions to the volume by the “Other” category. Since I’m the only one using this NAS, I’m not worried about the permissions. I would be if there were other uses syncing information.
Now that I’ve described the background, we can move to actually sharing the volume. First, go to your Syncthing volume that you made, and change the permissions to “Read” and “Execute” for “Other”. Once you have saved that, we have to share the volume with the Plex jail.
Navigate to the “Jails” tab and select plex, then click on “Add Storage”.
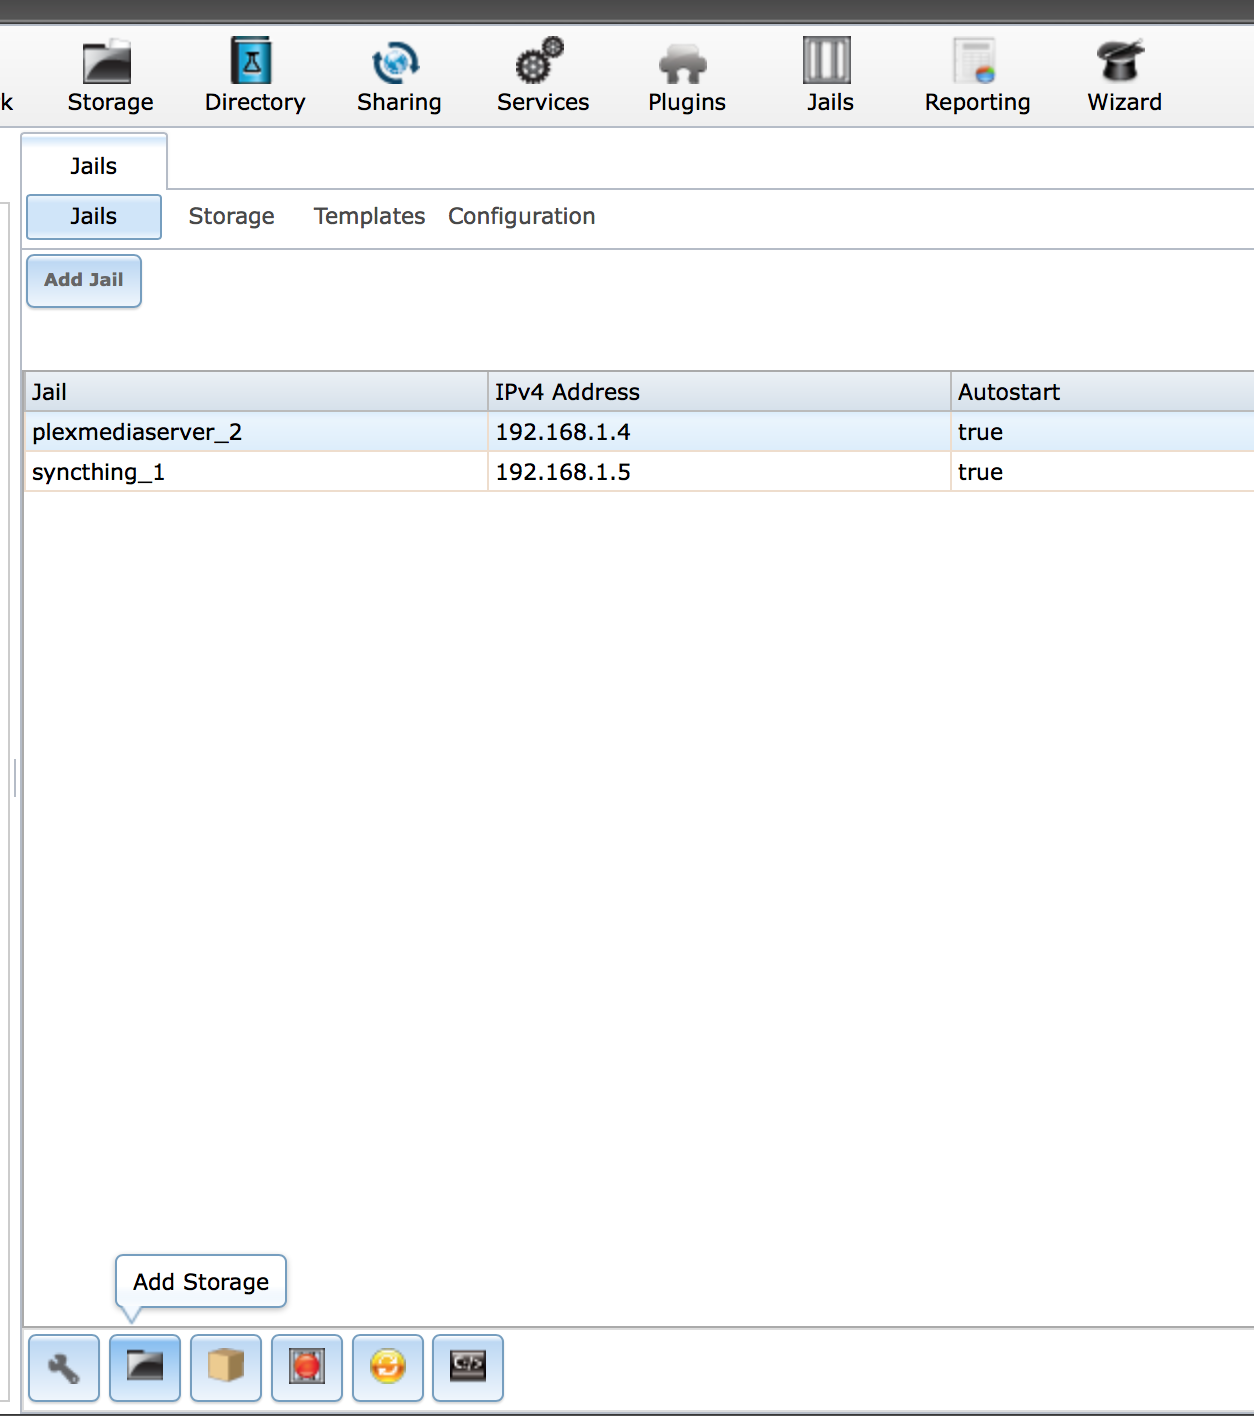
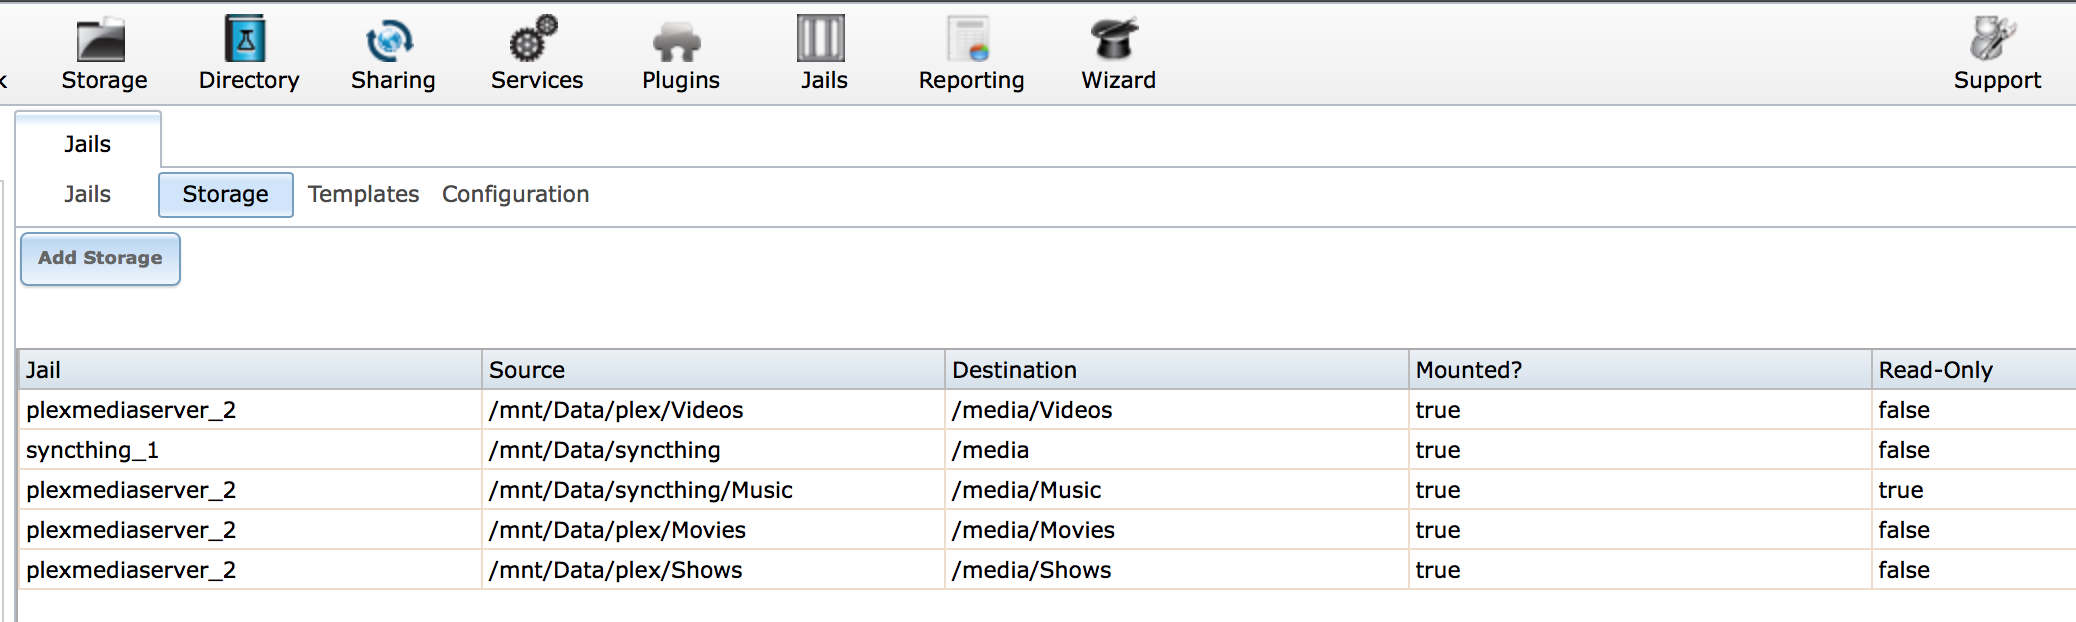
You will be presented with a pop that asks you to select the source and destination folders. The source folder is going to be the folder in syncthing where you are storing your data. For me, I have a folder named “Music” in syncthing that is specifically for music. Set that as your source directory. For your destination directory, you are going to select somewhere in the jail where you want the source folder to mount. For me, I used /media/Music.
A word of note: I set the added storage to “Read Only” just in case. It may not be necessary, but I wanted to make sure that I didn’t have Plex trying to write to my music library in any way.
If, prior to this, you had Plex just pointed at one directory with all your media, I recommend changing it so that each folder (Movies, Shows, etc) is a separate mount point in the jail. You don’t want to run into hierarchy issues with permissions.
Once you have done this, you should be able to go to Plex and add a library. Select “Music” and then point it at your media folder (remember we used /media/Music as the path). The initial cataloging might take a while, so let it do its thing.